Auth0 provides two ways to implement role-based access control (RBAC), which you can use in place of or in combination with your API’s own internal access control system:The Authorization Core feature set matches the functionality of the Authorization Extension, improves performance and scalability, and provides a more flexible RBAC system than the Authorization Extension.Currently, both implement the key features of RBAC and allow you to restrict the custom scopes defined for an API to those that have been assigned to the user as permissions.
Enable API access
- Go to Auth0 Dashboard > Extensions > Auth0 Authorization.
-
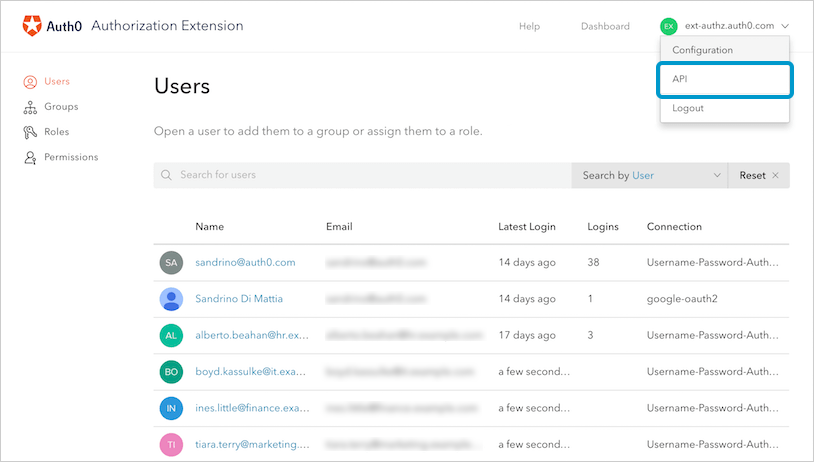
To get to API section, select your Auth0 tenant name on the top right of the Authorization Dashboard, then select API.
-
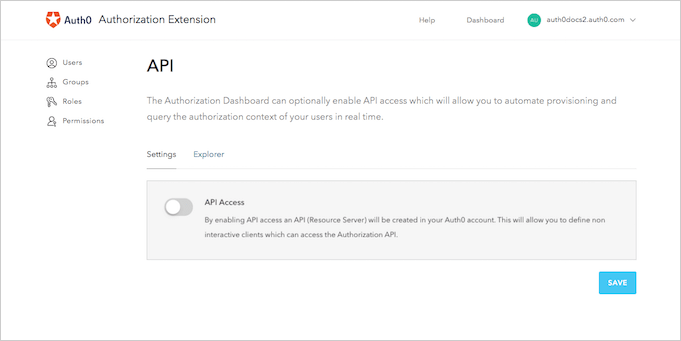
On the Settings page, enable the API Access switch.
-
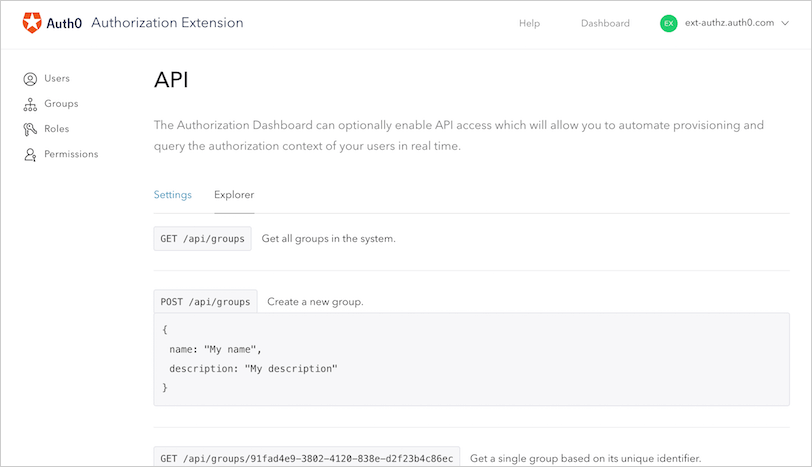
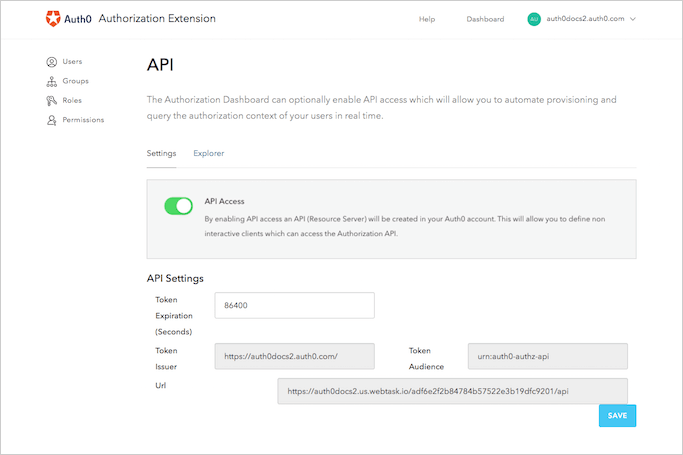
Once API Access is enabled, you’ll be able to see or control (within the extension) some of the parameters of the tokens issued by the API. You can control the time to expiration of the token, as well as view the token’s audience, issuer, and URL to access the API.
Access extension API
When you enabled API access to the extension, Auth0 automatically created an API for your use in the Auth0 Dashboard. To access the API, you’ll need to create a Machine to Machine Application, which is the entity that interacts with the API itself.Create applications
-
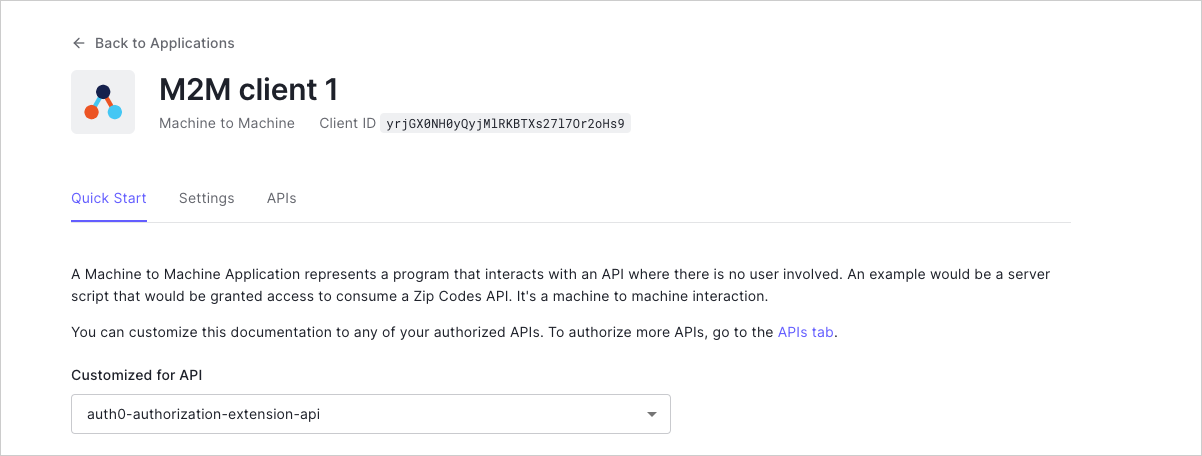
Navigate to Auth0 Dashboard > Applications > Applications, and select Create Application. Name your new Application, and choose the Machine to Machine Application type. Select Create to proceed.
You’ll be redirected to the Quick Start page of the Application, where you can customize the living documentation based on the API with which you’ll use the Application. Select the API that Auth0 created for your extension (it should be called auth0-authorization-extension-api or similar).
Since this is the first time you’re working with the API and Application together, you’ll see a message that says, “This application is not authorized for this API.” To authorize the application for use with the API, select Navigate to the API and Authorize.
-
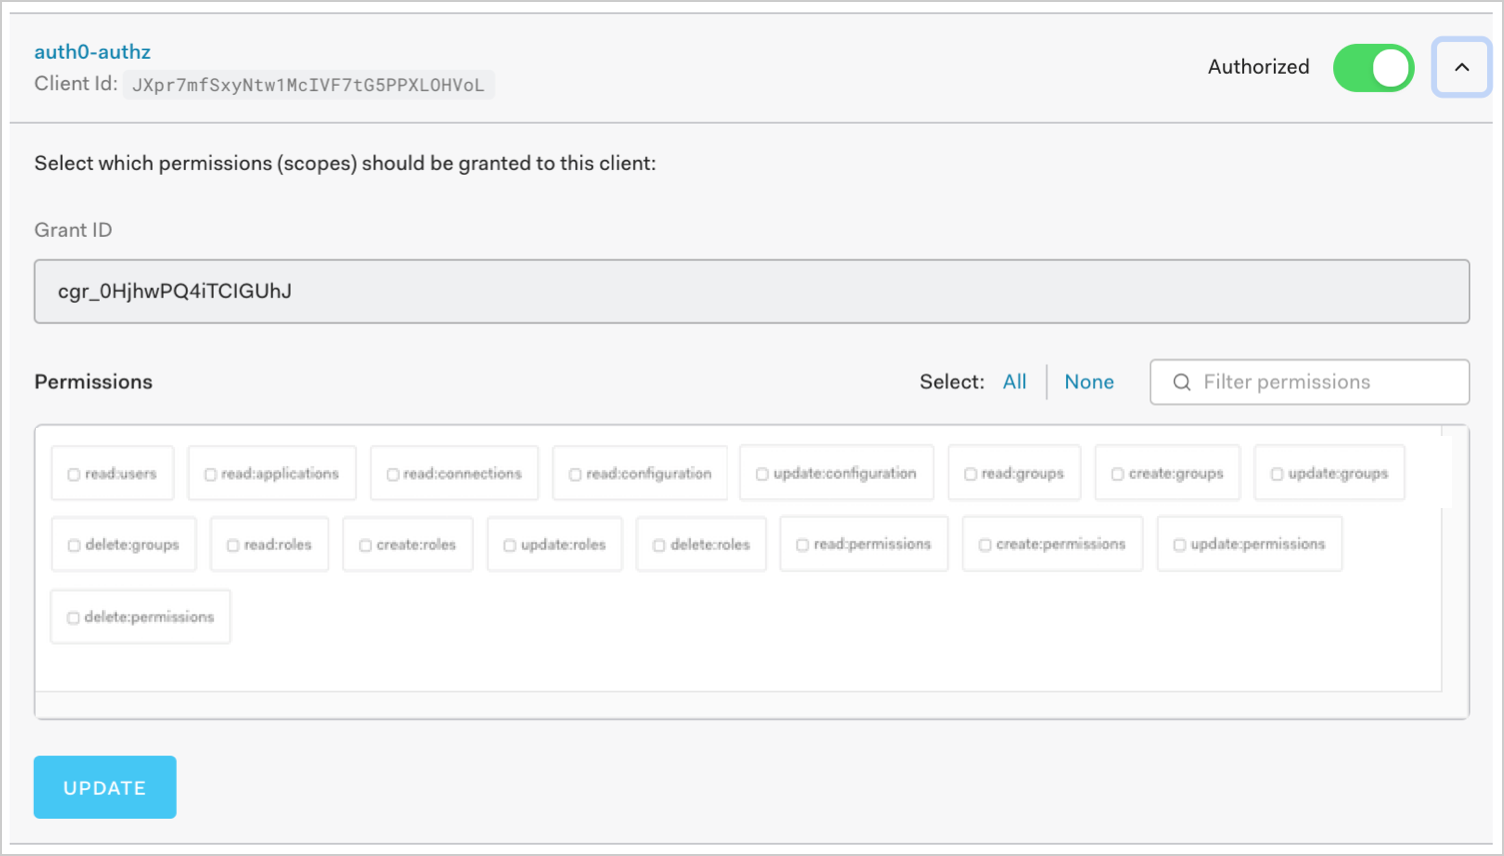
You’ll see a list of Machine to Machine Applications you can use with your API. Enable the switch next to the Application you just created to authorize it.
Once you’ve authorized the Application, you’ll see the Grant ID. You can also select the Scopes to be granted to the Application. The scopes you grant depends on the endpoints you want to access. For example, you’d grant

read:usersto get all users. -
If you make any changes to the scopes, select Update to save.
Get access token
To access the API, you’ll need to ask for and obtain the appropriate token.Call the API
You can call the API via:- An HTML request
- A cURL command