This feature uses delegation. By default, delegation is disabled for tenants without an add-on in use as of 8 June 2017. Legacy tenants who currently use an add-on that requires delegation may continue to use this feature. If delegation functionality is changed or removed from service at some point, customers who currently use it will be notified beforehand and given ample time to migrate. In addition, note that delegation does not support the use of custom domains so any features depending on it may not be fully functional alongside a custom domain.
In this step, you will build a single-page, serverless application using the AngularJS framework that you will serve out of an AWS S3 bucket configured to act as a static website.
For a simple starter app, download a sample project specific to this tutorial to get started. Log In to have your Auth0 credentials preconfigured.Copy the contents of this seed project to a local folder called pets, which you will be using for the remainder of this tutorial. Within this folder, update auth0-variables.js with your Auth0 Application AUTH0_CLIENT_ID and AUTH0_CLIENT_ID (this information is available in the Management Dashboard for the application in question).
Be sure that you have created the AWS S3 bucket configured to act as a static website. During the setup process, copy the contents of the pets folder to your S3 bucket to provide content for the website.If you are using a pre-existing bucket, you can move the files with the AWS CLI using the following command.
Prior to proceeding, please be sure that you have at least one user associated with your Username-Password-Authentication (or the Database Connection associated with the Application you are using) Connection. To fully utilize the functionality of your sample app and its integration with AWS, you will need that user to test authentication and gain access.Lastly, ensure that Auth0 allows authentication from your website by providing the URL in the Allowed Origins field in the Settings page of your Application. Your website’s URL should look something like this:http://your-bucket.s3-website-us-east-1.amazonaws.comIf you don’t know what your URL is, you can find it listed under the Properties tab of your S3 bucket.Before going further, test logging into your application. Open http://your-bucket-domain/index.html in your browser. After logging in, you should see an alert box pop up that says “getPets not implemented”:You should also see the page for viewing pets.
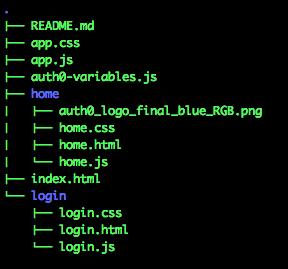
At this point, you have authentication set up with Auth0, and you have an . Here is the directory structure for the generated code:
You can use Auth0’s delegation capability to obtain an AWS that is based on the Auth0 . Behind the scenes, Auth0 authenticates your identity token, and then uses based on the addon that you configured.Update pets/login/login.js as follows to get an AWS delegation token from the identity token after a successful signin with auth.signin. Note that you are treating any user not logged in using a Social Connection as an admin. Later, we’ll code a second role and show better ways to enforce role selection.
auth.signin(params, function(profile, token) { //Set user as admin if they did not use a social login. profile.isAdmin = !profile.identities[0].isSocial; store.set('profile', profile); store.set('token', token); // get delegation token from identity token. var options = getOptionsForRole(profile.isAdmin, token); // TODO: Step 3: Enable this section once you setup AWS delegation. /* auth.getToken(options) .then( function(delegation) { store.set('awstoken', delegation.Credentials); $location.path("/"); }, function(err) { console.log('failed to acquire delegation token', err); }); */ // TODO: Step 3: Remove this redirect after you add the get token API. $location.path("/");}, function(error) { console.log("There was an error logging in", error);});
To modify the role and principal strings (which are the final two lines of the if statement contained in the provided function), specify the appropriate values via Rules:
Be sure to update the role and [principal] ARN values with the ones for your integration.Copy the updated files to your S3 bucket for your website.Optionally, you can set a breakpoint in the browser at store.set('awstoken', delegation.Credentials);. When you log out and and log back in, inspect delegation.Credentials when you arrive at the breakpoint. You will see a familiar values like AccessKeyId and SecretAccessKey:
To add the API code for adding a call to your service, copy the contents of apiGateway-js-sdk.zip you previously downloaded to the pets directory. The contents should include:
apiClient.js;
lib folder;
README.md.
To review the download, see AWS API Gateway Tutorial Part 2.There is already a README.md in the pets directory, so you will need to rename one of the files to keep both in the directory. The README.md for the API gateway explains how to use the API application from your Auth0 Application.Open the index.html file located in the root of your pets folder to add all of the scripts listed at the top of the API readme to index.html:
<!-- scripts for aws api gateway include after you create your package from aws for api gateway. --><script type="text/javascript" src="/docs/lib/axios/dist/axios.standalone.js"></script><script type="text/javascript" src="/docs/lib/CryptoJS/rollups/hmac-sha256.js"></script><script type="text/javascript" src="/docs/lib/CryptoJS/rollups/sha256.js"></script><script type="text/javascript" src="/docs/lib/CryptoJS/components/hmac.js"></script><script type="text/javascript" src="/docs/lib/CryptoJS/components/enc-base64.js"></script><script type="text/javascript" src="/docs/lib/moment/moment.js"></script><script type="text/javascript" src="/docs/lib/url-template/url-template.js"></script><script type="text/javascript" src="/docs/lib/apiGatewayCore/sigV4Client.js"></script><script type="text/javascript" src="/docs/lib/apiGatewayCore/apiGatewayClient.js"></script><script type="text/javascript" src="/docs/lib/apiGatewayCore/simpleHttpClient.js"></script><script type="text/javascript" src="/docs/lib/apiGatewayCore/utils.js"></script><script type="text/javascript" src="/docs/apigClient.js"></script>
If you open apigClient.js, you can see that the downloaded library has created wrappers like petsPost and petsGet for your API methods. You do not need to modify this generated code.
Open home.js in the home folder, and update the contents of getPets with a method for retrieving pets data (be sure to update the region if you are not running in us-east-1):
function getPets() { // this is unauthenticated var apigClient = apigClientFactory.newClient({ region: 'us-east-1' // The region where the API is deployed }); apigClient.petsGet({},{}) .then(function(response) { console.log(response); $scope.pets = response.data; $scope.$apply(); }).catch(function (response) { alert('pets get failed'); showError(response); });}
Copy the updated code to your S3 bucket. Refresh the page to see two animals listed (if you ran the previously described test on your APIs that created these pets).
Now that you have a working Auth0 Application with the API Gateway, you will add a method for updating the pets table.Modify the putPets method logic to update pets using your API function. This function will be used for both adding and removing pets.
function putPets(updatedPets) { var body = {pets: updatedPets}; var apigClient = apigClientFactory.newClient({ region: 'us-east-1' // set this to the region you are running in. }); apigClient.petsPost({},body) .then(function(response) { console.log(response); }).catch(function (response) { alert('pets update failed'); showError(response); });}
Copy the updated code to your S3 bucket. Test the method:
Log out and log back in.
Enter in values for Pet Type and Pet Price.
Click Save to post your data.
You should see a message that says, “We have a <Pet Type> for sale for <Pet Price>” with a red REMOVE button to its left.To add security, add the getSecureApiClient function at the start of the putPets method:
function putPets(updatedPets) { var apigClient = getSecureApiClient();}
Copy the code to your S3 bucket.The getSecureApiClient function provided for you retrieves the AWS token from local storage acquired using delegation to the API, and uses the access key, secret, and session token:
function getSecureApiClient() {
    var awstoken = store.get('awstoken');

    return apigClientFactory.newClient({
        accessKey: awstoken.AccessKeyId,
        secretKey: awstoken.SecretAccessKey,
        sessionToken: awstoken.SessionToken,
        region: 'us-east-1' // The region you are working out of.
    });
  }