Create the API
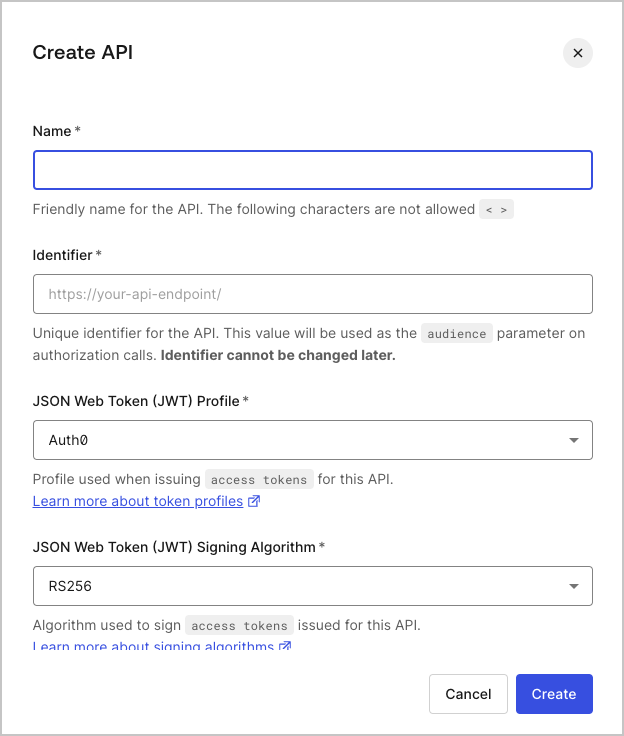
Navigate to the APIs section of the dashboard, and click the Create API button. You will be asked to supply the following details for your API:- Name: a friendly name for the API. Does not affect any functionality.
- Identifier: a unique identifier for the API. We recommend using a URL but note that this doesn’t have to be a publicly available URL, Auth0 will not call your API at all. This value cannot be modified afterwards.
- : the algorithm to sign the tokens with. The available values are
HS256andRS256. When selecting RS256 the token will be signed with the tenant’s private key. To learn more about signing algorithms, see Signing Algorithms.

Configure the Scopes
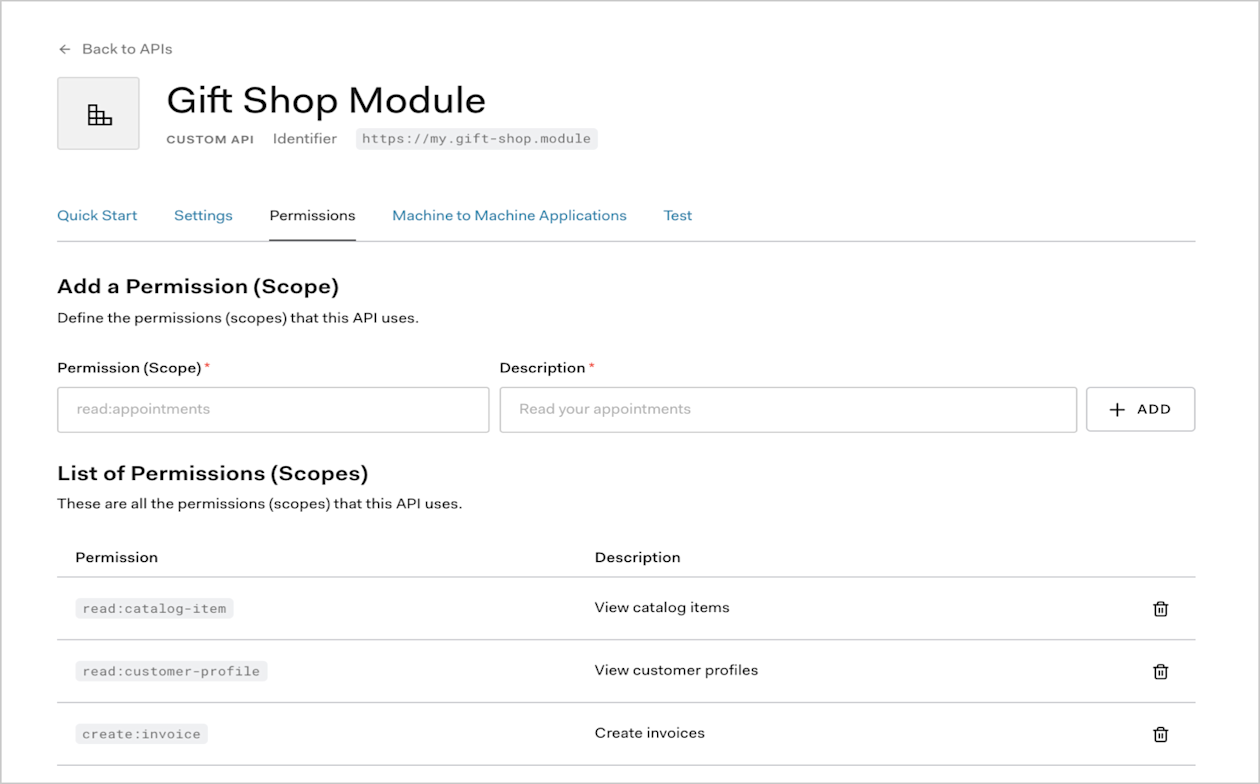
Once the application has been created you will need to configure the Scopes which applications can request during authorization. In the settings for your API, go to the Permissions tab. In this section you can add the scopes for our business case:read:timesheets, create:timesheets, delete:timesheets, and approve:timesheets.

Create the Application
There are four application types in Auth0:- Native App (used by mobile or desktop apps),
- Single-Page Web App,
- Regular Web App and
- Machine to Machine App (used by CLIs, Daemons, or services running on your backend).
Timesheets SPA) and select Single-Page Web App as the type.
Click Create.
That’s it for now. When we are done with the SPA implementation we will revisit the dashboard and this Application’s settings to make some changes in its configuration.
Configure the Authorization Extension
You will need to ensure that the Authorization Extension is installed for your tenant. You can refer to the Authorization Extension documentation for details on how to do this.Define Permissions
You will now define the required Permissions, according to the scopes you have already defined:read:timesheets, create:timesheets, delete:timesheets, and approve:timesheets.
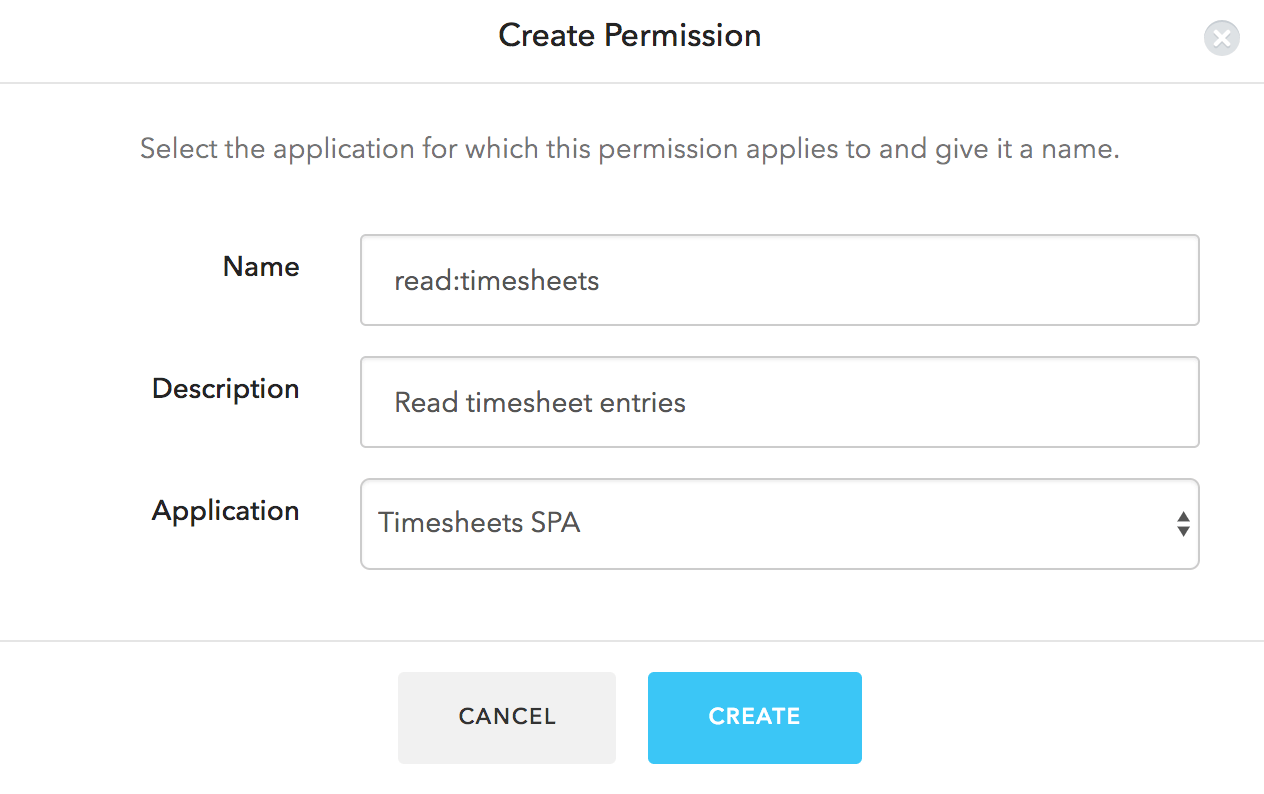
In the Authorization Extension, click the Permissions tab, and then click on the Create Permission button.
In the dialog, capture the details for each permission.
Ensure that the name of the permission is exactly the same as the corresponding scope:

Define Roles
Next let’s configure the two Roles: employee and manager. Head over to the Roles tab, click the Create Role button, and select the Timesheets SPA application. Set the Name and Description toEmployee, and select the delete:timesheets, create:timesheets and read:timesheets permissions. Click on Save.
Next, follow the same process to create a Manager role, and ensure that you have selected all the permissions.
Assign Users to Roles
You need to assign all users to either theManager or the Employee role.
You can do this by going to the Users tab in the Authorization Extension and selecting a user.
On the user information screen, go to the Roles tab. Click Add Role to User, and select the appropriate role.
Configuring the Authorization Extension
You will also need to ensure that the Rule for the Authorization Extension is published. To do so, click on your user avatar in the top right of the Authorization Extension, and select Configuration. Make sure that Permissions are enabled and then click Publish Rule.Create a Rule to validate token scopes
The final step in this process is to create a Rule to check if the scopes contained in an are valid based on the permissions assigned to the user. Any scopes which are not valid for a user should be removed from the Access Token. In your , go to the Rules tab. You should see the Rule created by the Authorization Extension. Click on the Create Rule button and select the Empty Rule template. You can give the Rule a name, such as Access Token Scopes, and then specify the following code for the Rule:action:area or delete:timesheets) which are valid according to a user’s permissions. Once you are done you can click on the Save button.
Rules execute in the order they are displayed on the Rules page, so ensure that the new rule you created is positioned below the rule for the Authorization Extension, so it executes after the Authorization Extension rule.
