Use the following configuration for Oracle Eloqua Marketing Cloud.Documentation Index
Fetch the complete documentation index at: https://auth0-cq3uo.mintlify.app/llms.txt
Use this file to discover all available pages before exploring further.
Configure SAML SSO in Auth0
- Go to Dashboard > Applications > Applications and either create a new application or click the name of the application you want to update.
- Go to the Addons tab and enable the SAML2 Web App toggle.
-
On the Settings tab, set the Application Callback URL to:
https://login.eloqua.com/auth/saml2/acs.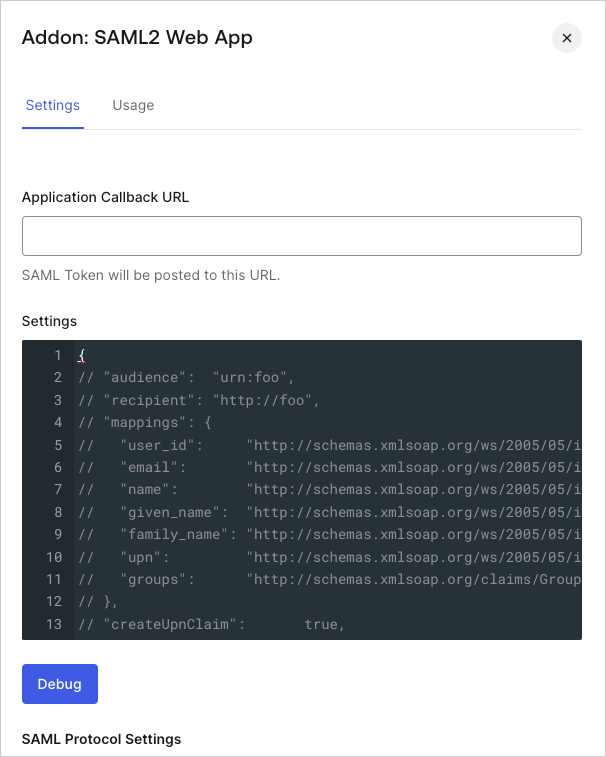
-
Paste the following code into the Settings text box and click Debug.
Note that the
audienceis set tohttp://foo. This will be changed when the identity provider settings are completed on the Eloqua side. - Scroll to the bottom of the tab and click Enable.
-
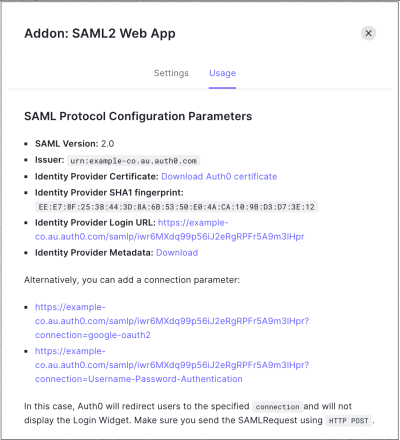
On the Usage tab, locate the Identity Provider Metadata and click Download to download the metadata file. You’ll need this when you configure Auth0 as the identity provider in Eloqua.
Configure SAML SSO in Oracle Eloqua
- Login as Admin on Eloqua and click on Settings > Users > Single Sign-On > Identity Provider Settings.
- Click Upload Identity Provider from Metadata. Upload the Identity Provider metadata you downloaded from the Usage tab in the Auth0 Dashboard.
- Browse to find the downloaded metadata file.
-
Edit the newly added identity provider and complete the following steps:
- Set the User Identity Mapping to
Assertion contains the Email Address from the User objectand click Save. - From the Identity Provider Details copy the Service Provider Entity URL.
- Within ELOQUA IdP settings, if this is the default IdP, mark this IdP as default.
- Set the User Identity Mapping to
Update Audience Restriction in Auth0
Use the Service Provider Entity URL copied from the settings in Eloqua to set theaudience restriction in the .
- Go to Dashboard > Applications > Applications and click the name of the application you want to update.
- Go to the Addons tab and enable the SAML2 Web App toggle.
- On the Settings tab, update the
audienceto the value you copied from Eloqua.
Test configuration
Login to Eloqua with Auth0 should be enabled now. You can sign in to Eloqua with both IdP-initiated login and SP-initiated login.- For SP-initiated login, go to <https://login.eloqua.com/auth/saml2> and enter your company name and start the SAML login process with Auth0.
- For IdP-Initiated login use the Identity Provider Login URL defined here: Dashboard > Applications > Applications on the Addons tab, SAML 2 Web App, Usage tab.