Configure the SAML2 Web App addon for Amazon Web Services (AWS) for an application.Documentation Index
Fetch the complete documentation index at: https://auth0-cq3uo.mintlify.app/llms.txt
Use this file to discover all available pages before exploring further.
- Go to Dashboard > Applications > Applications and either create a new application or click the name of an application to update.
- Go to the Addons tab and enable the SAML2 Web App toggle.
-
On the Settings tab, set the Application Callback URL to:
https://signin.aws.amazon.com/saml.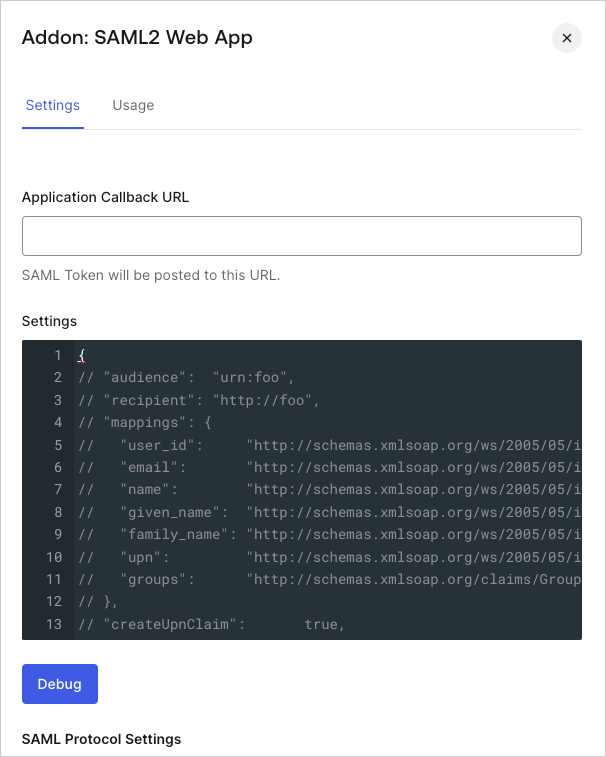
-
Paste the following code into the Settings text box and click Debug. Be sure to replace the
AWS_SSO_ISSUER_URLandAWS_SSO_ACS_URLplaceholders with values you copied from AWS. - Scroll to the bottom of the page and click Enable.
-
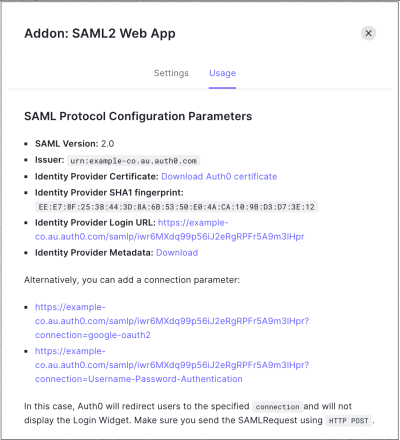
On the Usage tab, locate Identity Provider Metadata, and click Download to download the metadata file. You’ll need this when you configure Auth0 as the identity provider.