By Rita Zerrizuela
This guide demonstrates how to integrate Auth0 with any new or existing Next.js application using the Auth0 Next.js SDK.We recommend that you log in to follow this quickstart with examples configured for your account.New to Auth? Learn How Auth0 works, how it integrates with Regular Web Applications and which protocol it uses.
Configure Auth0
Get Your Application Keys
When you signed up for Auth0, a new application was created for you, or you could have created a new one. You will need some details about that application to communicate with Auth0. You can get these details from the Application Settings section in the Auth0 dashboard.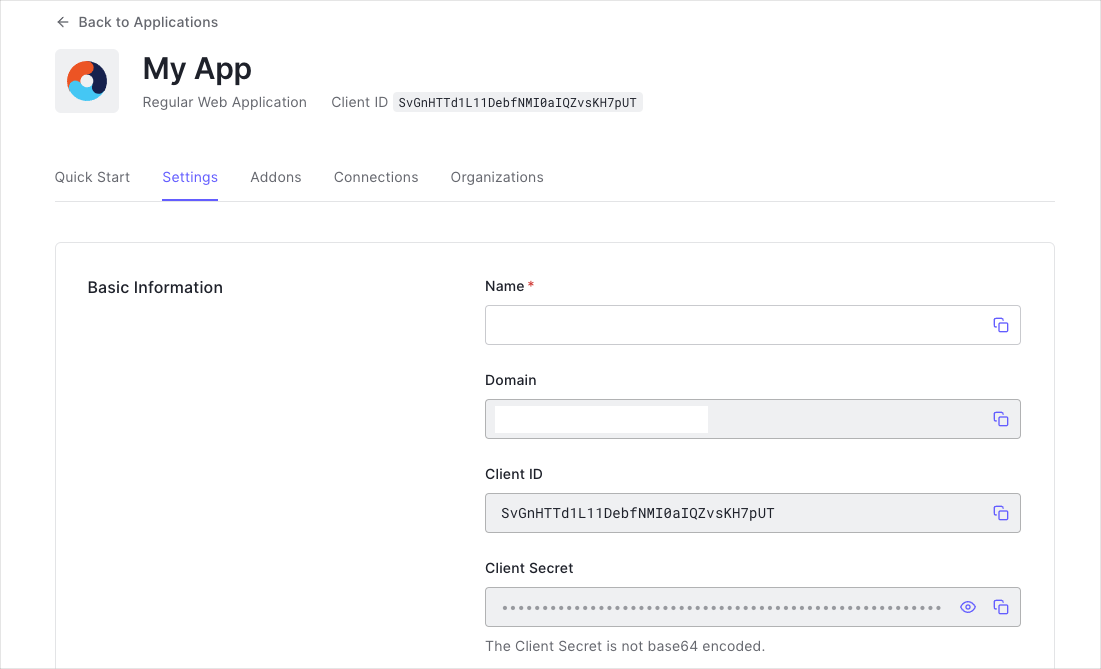
- Domain
- Client ID
- Client Secret
If you download the sample from the top of this page, these details are filled out for you.
Configure Callback URLs
A callback URL is a URL in your application where Auth0 redirects the user after they have authenticated. The callback URL for your app must be added to the Allowed Callback URLs field in your Application Settings. If this field is not set, users will be unable to log in to the application and will get an error.If you are following along with the sample project you downloaded from the top of this page, the callback URL you need to add to the Allowed Callback URLs field is
http://localhost:3000/auth/callback.Configure Logout URLs
A logout URL is a URL in your application that Auth0 can return to after the user has been logged out of the authorization server. This is specified in thereturnTo query parameter. The logout URL for your app must be added to the Allowed Logout URLs field in your Application Settings. If this field is not set, users will be unable to log out from the application and will get an error.
If you are following along with the sample project you downloaded from the top of this page, the logout URL you need to add to the Allowed Logout URLs field is
http://localhost:3000.Install the Auth0 Next.js SDK
Run the following command within your project directory to install the Auth0 Next.js SDK:Configure the SDK
In the root directory of your project, create the file.env.local with the following environment variables:
AUTH0_SECRET: A long secret value used to encrypt the session cookie. You can generate a suitable string usingopenssl rand -hex 32on the command line.APP_BASE_URL: The base URL of your applicationAUTH0_DOMAIN: The URL of your Auth0 tenant domainAUTH0_CLIENT_ID: Your Auth0 application’s Client IDAUTH0_CLIENT_SECRET: Your Auth0 application’s Client Secret
Manually add the values for
AUTH0_AUDIENCE and AUTH_SCOPE to the file lib/auth0.js. These values are not configured automatically.
If you are using a Custom Domain with Auth0, set AUTH0_DOMAIN to the value of your Custom Domain instead of the value reflected in the application “Settings” tab.Create the Auth0 SDK Client
Create a file atlib/auth0.js to add an instance of the Auth0 client. This instance provides methods for handling authentication, sesssions and user data.
Add the Authentication Middleware
The Next.js Middleware allows you to run code before a request is completed. Create amiddleware.ts file. This file is used to enforce authentication on specific routes.
middleware function intercepts incoming requests and applies Auth0’s authentication logic. The matcher configuration ensures that the middleware runs on all routes except for static files and metadata.
Auto-configured routes
Using the SDK’s middleware auto-configures the following routes:/auth/login: The route to perform login with Auth0/auth/logout: The route to log the user out/auth/callback: The route Auth0 will redirect the user to after a successful login/auth/profile: The route to fetch the user profile/auth/access-token: The route to verify the user’s session and return an access token (which automatically refreshes if a refresh token is available)/auth/backchannel-logout: The route to receive alogout_tokenwhen a configured Back-Channel Logout initiator occurs
The
/auth/access-token route is enabled by default, but is only neccessary when the access token is needed on the client-side. If this isn’t something you need, you can disable this endpoint by setting enableAccessTokenEndpoint to false.Add Login to Your Application
Users can now log in to your application at/auth/login route provided by the SDK. Use an anchor tag to add a link to the login route to redirect your users to the Auth0 Universal Login Page, where Auth0 can authenticate them. Upon successful authentication, Auth0 redirects your users back to your application.
Next.js suggests using Link components instead of anchor tags, but since these are API routes and not pages, anchor tags are needed.
Checkpoint
Add the login link to your application. Select it and verify that your Next.js application redirects you to the Auth0 Universal Login page and that you can now log in or sign up using a username and password or a social provider.Once that’s complete, verify that Auth0 redirects back to your application.If you are following along with the sample app project from the top of this page, run the command: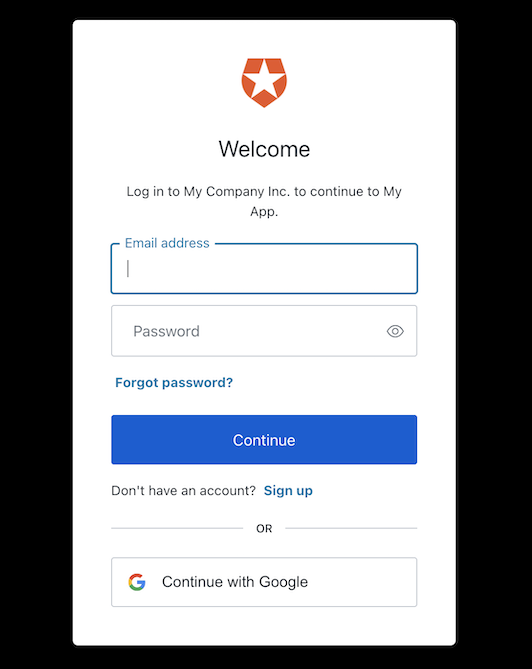
Auth0 enables the Google social provider by default on new tenants and offers you developer keys to test logging in with social identity providers. However, these developer keys have some limitations that may cause your application to behave differently. For more details on what this behavior may look like and how to fix it, consult the Test Social Connections with Auth0 Developer Keys document.
Add Logout to Your Application
Now that you can log in to your Next.js application, you need a way to log out. Add a link that points to the/auth/logout API route. To learn more, read Log Users out of Auth0 with OIDC Endpoint.
Checkpoint
Add the logout link to your application. When you select it, verify that your Next.js application redirects you to the address you specified as one of the “Allowed Logout URLs” in the application “Settings”.Show User Profile Information
The Auth0 Next.js SDK helps you retrieve the profile information associated with the logged-in user, such as their name or profile picture, to personalize the user interface.From a Client Component
The profile information is available through theuser property exposed by the useUser() hook. Take this Client Component as an example of how to use it:
user property contains sensitive information and artifacts related to the user’s identity. As such, its availability depends on the user’s authentication status. To prevent any render errors:
- Ensure that the SDK has completed loading before accessing the
userproperty by checking thatisLoadingisfalse. - Ensure that the SDK has loaded successfully by checking that no
errorwas produced. - Check the
userproperty to ensure that Auth0 has authenticated the user before React renders any component that consumes it.
From a Server Component
The profile information is available through theuser property exposed by the getSession function. Take this Server Component as an example of how to use it: